There are mainly 3 methods to create Pick up and Drop off points.
As a first step, please decide and set Stoppage duration, how long (in seconds) a vehicle stops before it can be considered stopped.
You may set stoppage duration under Settings >> Business >> Stoppage >> Stationary for “xx” seconds. It is recommended to set the stoppage for 30 seconds.
Once the stoppage is defined, let the School Bus complete its regular Pick up/drop off trip for 2-3 days. Please instruct the driver to stop in desired points for the set seconds (e.g., 30 seconds).
Method 1
Step 1 :
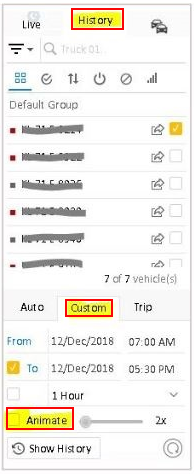
Log in to your AVLView account and re-play the bus trip history. Trip history can be played from MapView >> History >> Custom (You may uncheck “Animate” option while replaying the trip history).

Step 2 :
On completion of the replay, the route plied by the vehicle for the chosen time period is displayed on the map. If you consider this as a legitimate route for the upcoming trips, please click on create route and save.

Step 3 :
All the stoppages happened during the trip will be shown under Manage Route Fence (on the right panel). Please delete all irrelevant points (by clicking on “X”) and retain the relevant PoIs/Stoppages, name the route and click on Save to save the POIs. It is advisable to take the assistance of School Bus Driver to mark all the Pick up/Drop off points/POIs in order to avoid adding any duplicate/irrelevant points/PoIs. You may add a maximum of 23 PoIs (excluding start & end points) to a route using this method.

Method 2
Step 1:
Replay the trip history of the School Bus as above, that plied picking up/dropping off students along the way.
It is advisable to take the assistance of School Bus Driver to mark all the Pick up/Drop off points/POIs in order to avoid adding any duplicate/irrelevant points/PoIs. You may add a maximum of 23 PoIs (excluding start & end points) to a route using this method.
Trip history can be played from MapView >> History >> Custom (You may uncheck “Animate” option while replaying the trip history).
Step 3 :
Hover the mouse next to “Stop” displayed on the map and right click, you will see an option to “Create Point of Interest” (PoI). Please refer to the images below.
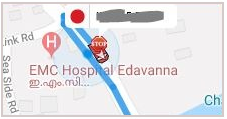
Note: Please make sure that “Stop” icon is inside PoI Buffer (light Blue colour circle is the POI buffer) and one POI should not overlap another PoI. You may adjust the buffer size as shown in the image below.

On choosing to “Create Point of Interest”, the POI’s latitude and Longitude) will be displayed under “Manage POI/Zones”.

Step 4:
Provide a relevant name for the pickup/drop off point. Please choose the category from the drop down list or create a relevant category by clicking on “+” sign next to the category.
Eg: Pick up can be named as “Bus number 1, Pick Up Trip, Junior, Stop number 1”

Step 5:
Click on Save to save the PoI, and repeat the above steps to add all pick up/drop off points.
Method 3
The following method can be useful if we know the exact pick up/drop off location or latitude and longitude.
Step 1:
In MapView tab, enable “Show Right Pane” and select “Search Places”.
Step 2 :
Type the exact location or latitude and longitude. Based on the location name or lat-long you key in, the map will get redirected to the correct POI.

Step 3 :
Add as a PoI to save the PoI, and repeat the above steps to add all pick up/drop off points.


