Set User Privileges
I have vehicles running for different departments in my company. When my sub-user Salesman logs in, I want him to see only the vehicles running for the Sales department.
Firstly, we need to group your vehicles according to the departments. Then, assign these group(s) to the applicable sub-user(s).
To create a new group
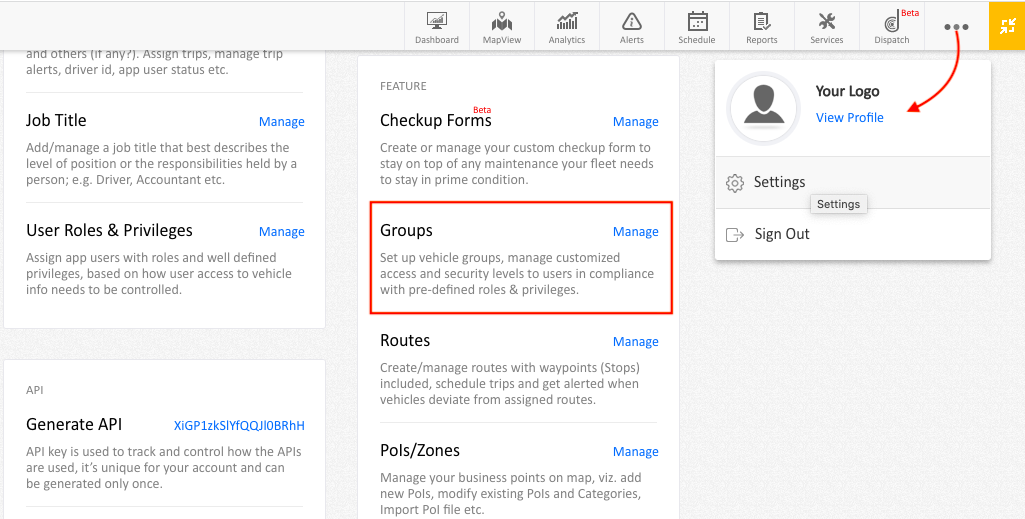
Step 1: Navigate to Settings
Go to Settings and click “Groups”
Step 2: “Add New Group”
Add a new group, name it and save the changes
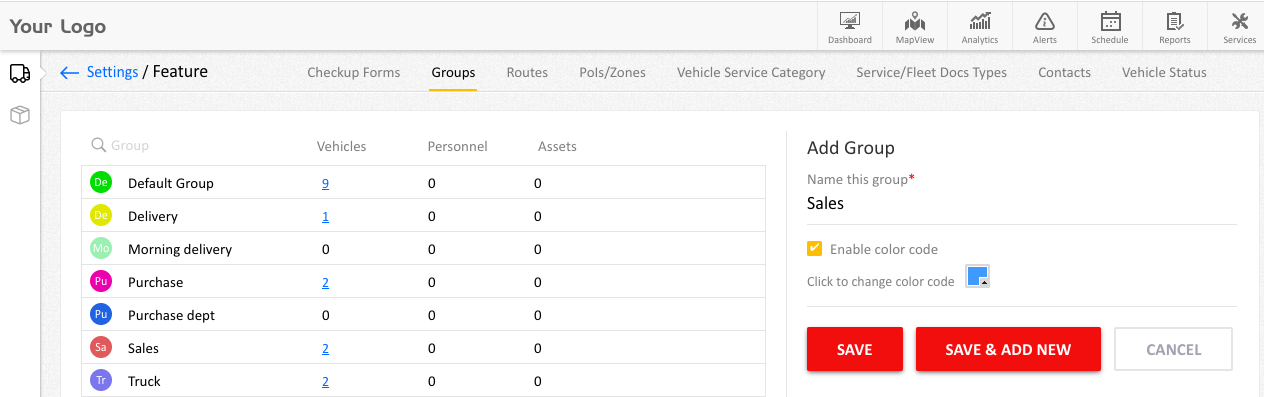
Step 3: Repeat the step
Repeat the step to create different groups for all the departments in your company
Assigning vehicles to a group
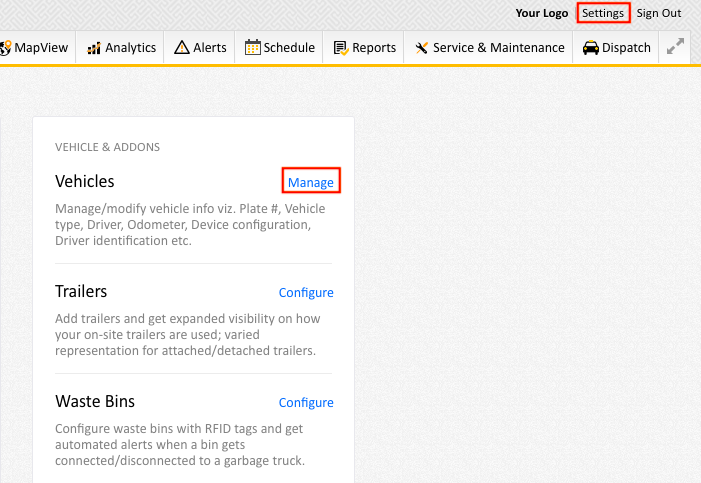
Step 1 : Manage vehicles
Go to Settings and click ‘Manage’ in Vehicles
Step 2: Choose a vehicle number
Choose the vehicle number in the left pane
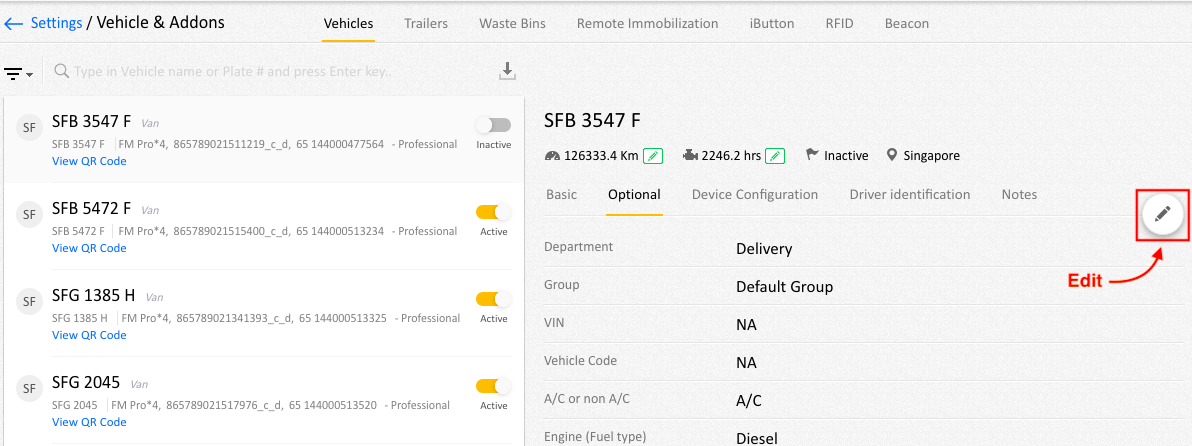
Step 3: click Optional
In the right pane, click Optional
Step 4: Click Edit button
Step 5: Select the desired Group
Select the desired Group for this vehicle from drop down
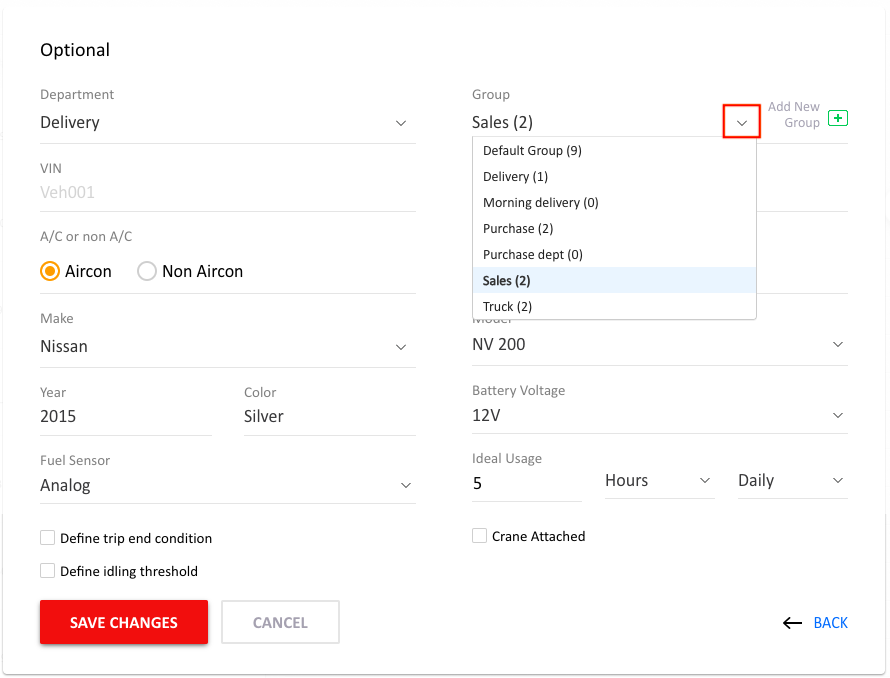
Step 6: Save the Changes
Step 7: Apply changes to all vehicles
Apply this for all the vehicles in the list
To assign group(s) to a sub-user
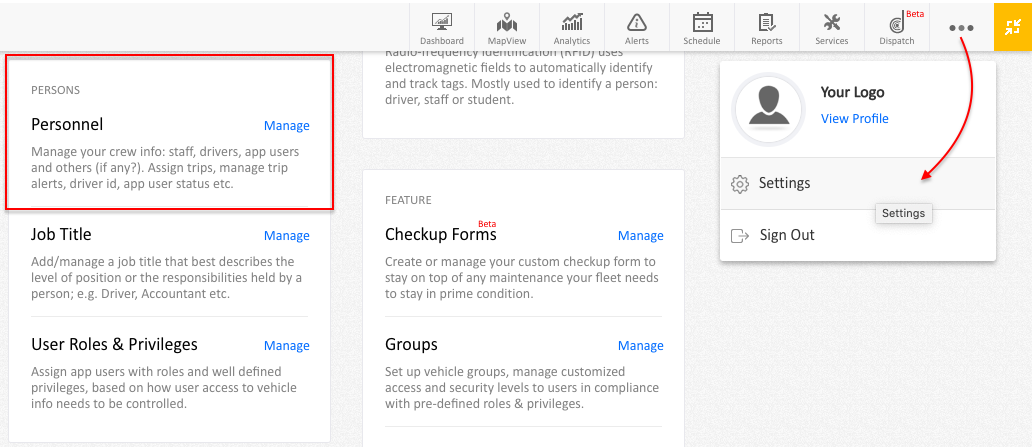
Step 8: Click “Personnel”
Go to Settings and click “Personnel”
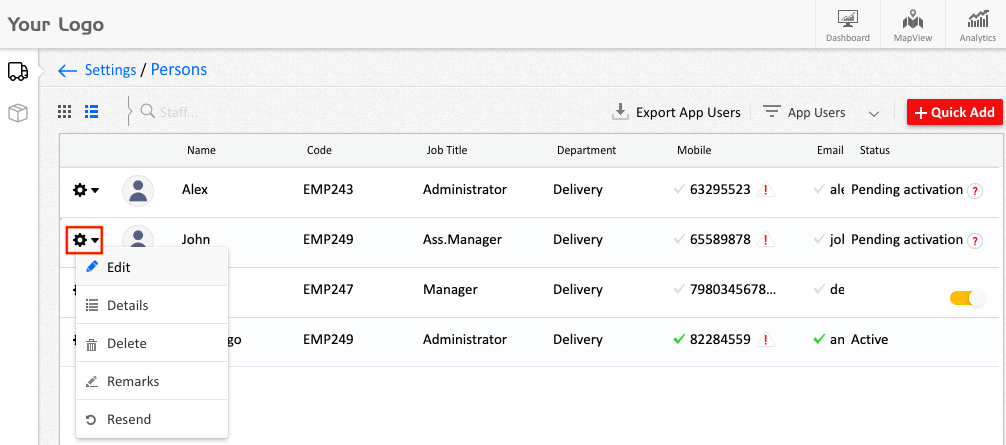
Step 9: Edit user details
Click the Settings button next to the user name and opt to Edit
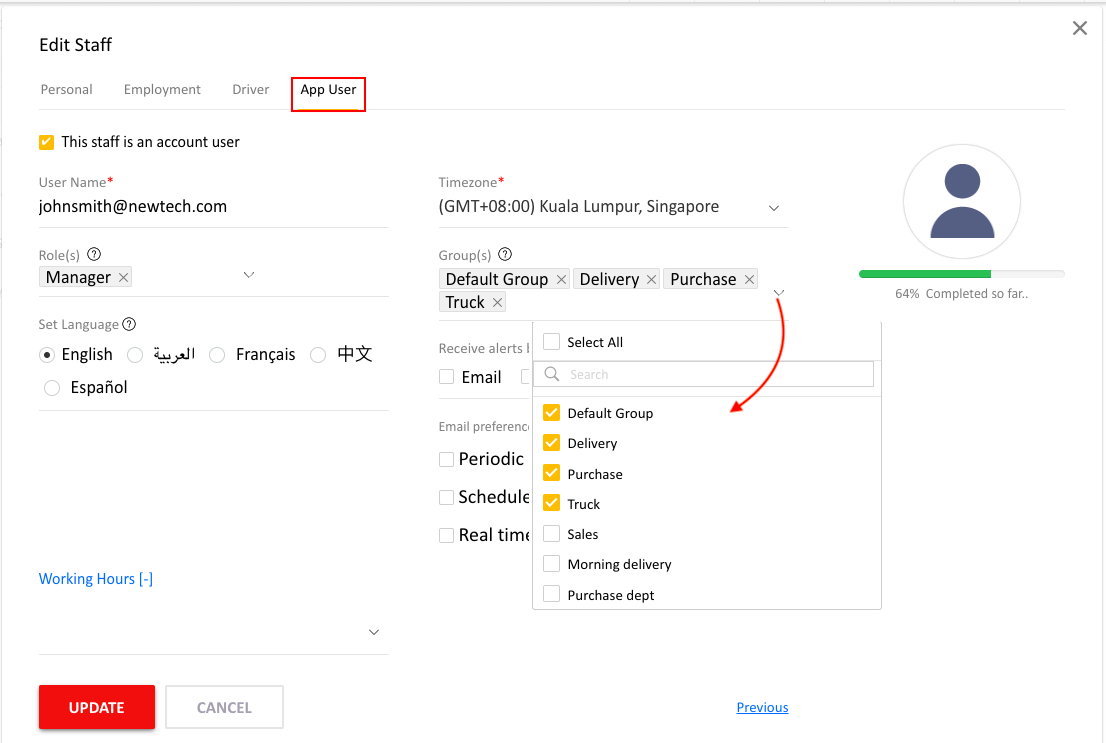
Step 10 : Choose vehicle groups
Under Groups, select the group(s) you wish to assign to this user