- Release notes - AVLView (v5.1)
- Better control on the kind of vehicle tracking reports your business require
- Reports => Switch to ad hoc reports
- To generate AVLView vehicle tracking reports (ad hoc), follow these steps:
- A more useful ‘Find Nearby Vehicles’
- Upload your vehicle schedule, all at once..
- Improvements to Point of Interest (PoI) auto suggestions
- Other Improvements
Release notes – AVLView (v5.1)
This update comes with some of the top features requested, so do a test drive and give us your feedback on Twitter – @avlview
Better control on the kind of vehicle tracking reports your business require
You can create vehicle tracking reports from an array of templates. Besides, you will be able to choose the columns that you want on your new report.
And, guess what? We are not going to stop with this; it’s just a start to a series of improvements to enrich your experience in fleet management, to make it a walk in the park.
No worries! Your old vehicle tracking reports are not going anywhere; you can quickly switch on and view them at anytime you want to.
Reports => Switch to ad hoc reports
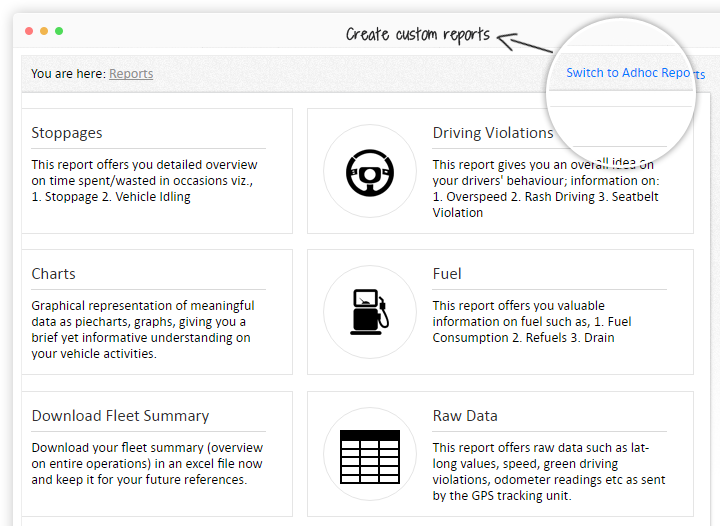
To generate AVLView vehicle tracking reports (ad hoc), follow these steps:
Step 1. Go to Reports tab on the main menu.
Step 2. Click on ‘Switch to Ad Hoc Reports’.
Step 3. Click ‘Add New’ to create a customized report.
Step 4. Name your report first & choose the template from which you wish to create the report. e.g., Trip report
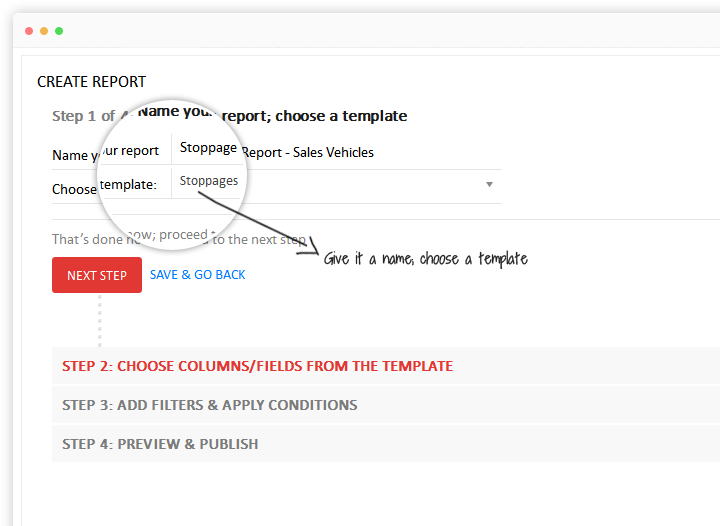
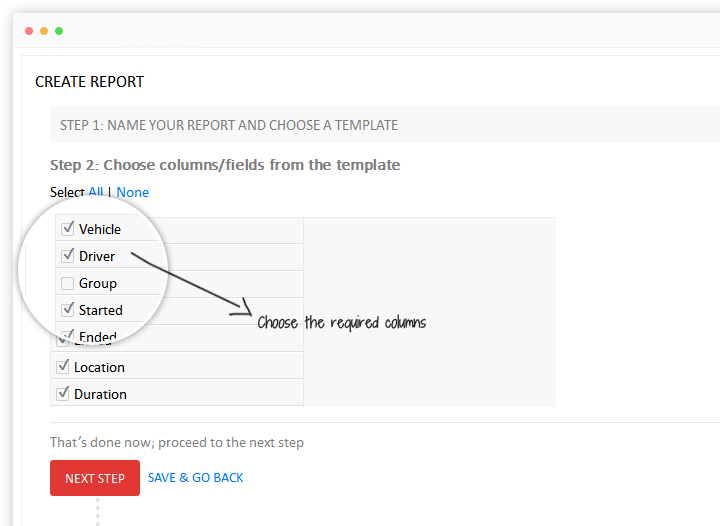
Step 5. Choose columns/fields from the chosen template.
Step 6. Add filters/conditions to generate the reports based on selective criteria.
e.g., Period = Last 7 days
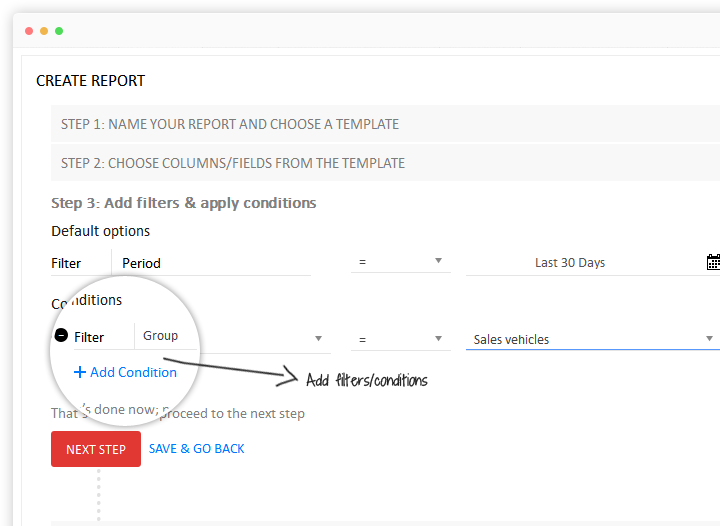
You may use ‘+’ button to add a 2nd filter/condition
Eg: Group = Sales
Step 7. Preview and publish the new template you created.
So, the report will be generated for all the vehicles in ‘Sales’ group for the last seven days. And this report would be kept as a template, so every time you choose a date, report for the previous seven days will be automatically generated. You could see an overview of this report on Ad hoc report page itself.
Note: You may modify, delete, copy or download (.xls or .pdf) your custom reports at any point of time as you wish to, you just need to create the report once.
A more useful ‘Find Nearby Vehicles’
You may now find the nearby vehicles to one of your saved Points of Interest (PoI) or the Google Places that you select on the map. All you need to do is go to the left panel (Live, History tabs), choose either of the options as shown in the image and specify the range in km.
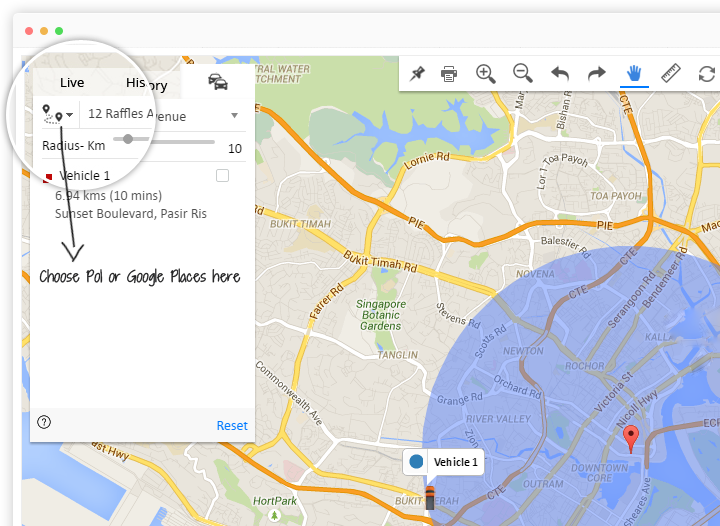
From the image given above, what you could see is:
A 10 km radius has been defined to find nearby vehicles to a Point of Interest (PoI) named ‘12 Raffles Avenue’. From the result, you could see car/truck called ‘Vehicle 1’ located about 6.94 km away from ‘12 Raffles Avenue’ and the system suggests that it’s nearly 10 minutes away from the PoI.
Upload your vehicle schedule, all at once..
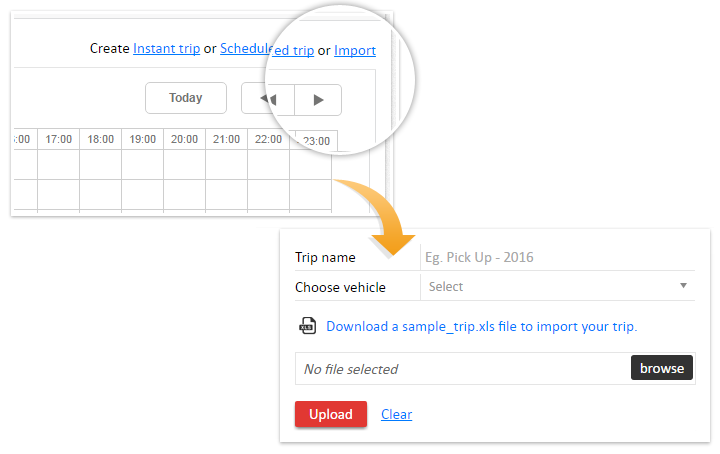
Creating a vehicle schedule is easy enough with AVLView. However, we have made it much easier with the introduction of ‘Import’ option.
Schedule => Import
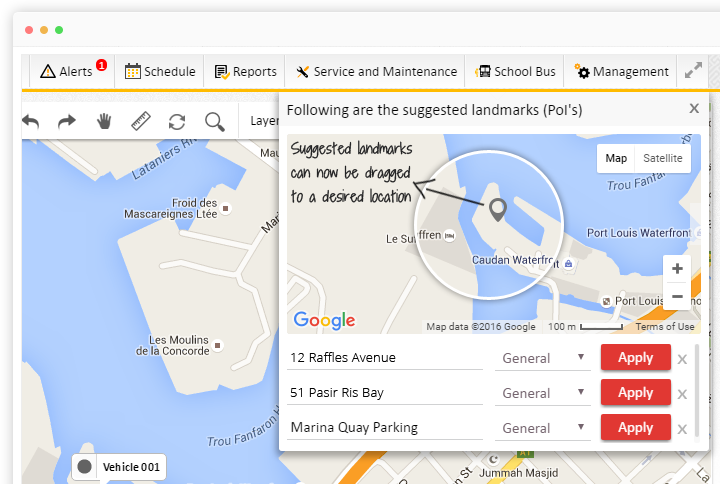
Improvements to Point of Interest (PoI) auto suggestions
– On the map, chosen PoI is highlighted to avoid confusions during addition.– Reposition the PoI by dragging with your mouse.
Other Improvements
- You will see installation date along with vehicle information. And vehicle information can be downloaded as an Excel file.
- You can add a new PoI directly from spot fence alert settings itself. To create one, please click on the ‘+’ sign against the PoI drop down, you’ll see a map for new PoI addition. Similarly, you may create a new route from Route fence alert settings too.
- Battery disconnection email alert to have more information including location, date & time.
- Lazy loading implemented for faster page loading in Organizational Structure.


