Published Jul 2026
Create a Route Fence
A route fence is a corridor between two points that a vehicle should follow. If the vehicle deviates from the corridor, MapView alerts you — useful for keeping deliveries and long-haul trips on their planned path.
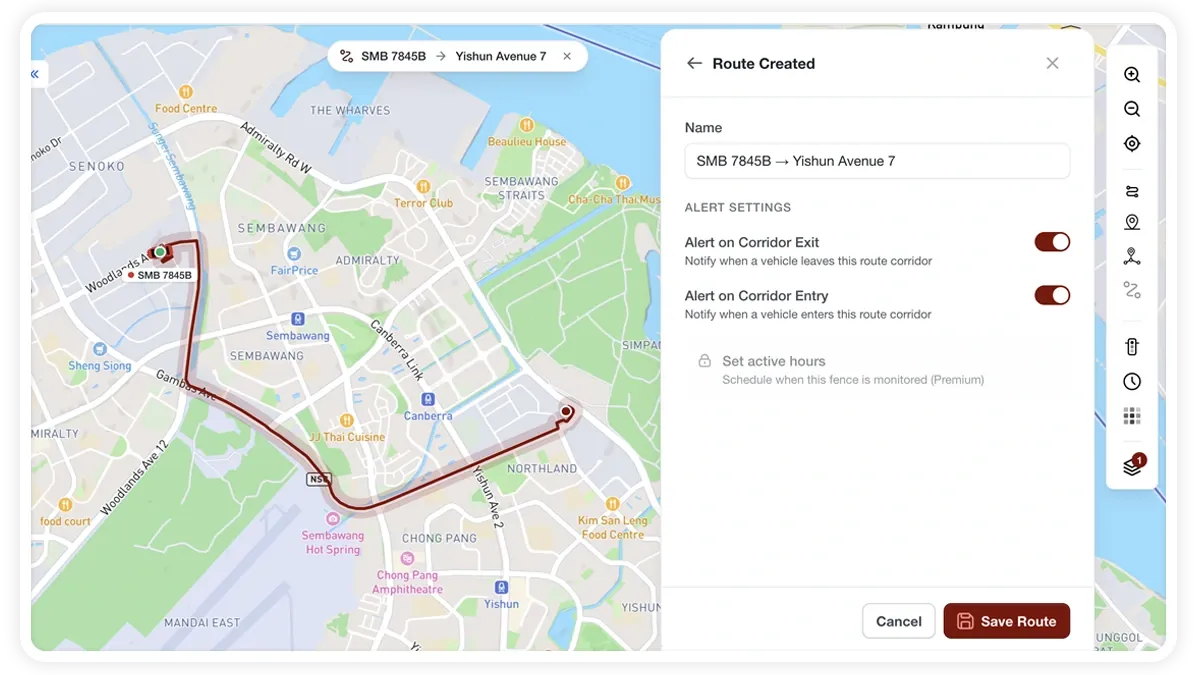
How to create a route fence
- Open the POI tool and choose Trace a route fence.
- Set the corridor using one of the two methods below.
- Give the fence a name.
- Set the alerts: Alert on Exit is on by default; turn on Alert on Entry if you want it too.
- Click Save.
Two ways to set the route
- From a past trip — pick a vehicle and a date, load its trips, and select one. The trip’s start and end become the fence.
- Create a new route — enter a From and a To address using autocomplete, and the corridor is traced between them.
Alert options
- Alert on Exit — notifies you when the vehicle leaves the corridor. On by default.
- Alert on Entry — notifies you when the vehicle enters the corridor.
Frequently asked questions
What’s the difference between a route fence and a geofence?
A geofence watches a single area (a zone). A route fence watches a corridor between two points and alerts when a vehicle strays off the planned path, so it’s better for point-to-point journeys.
Can I reuse an actual trip as the route?
Yes. Choose “From a past trip”, pick the vehicle and date, load its trips, and select the one you want — its start and end define the fence.
Related
Next
Manage Your Saved Places
The Saved Places list in MapView keeps every POI, zone, and route fence in one place to search, filter, locate, get directions, watch, or delete.
Learn more about this feature
Explore featureMore in Maps & Geofencing
Didn't find what you needed?Contact support