Published Aug 2026
Manage Tyres
Tyre Manager (Services > Maintenance > Tyre Manager) tracks every tyre on each vehicle. Pick a vehicle and the layout follows its vehicle type, so each tyre sits in its real position. From there you can add tyre data, rotate positions or replace a worn tyre.
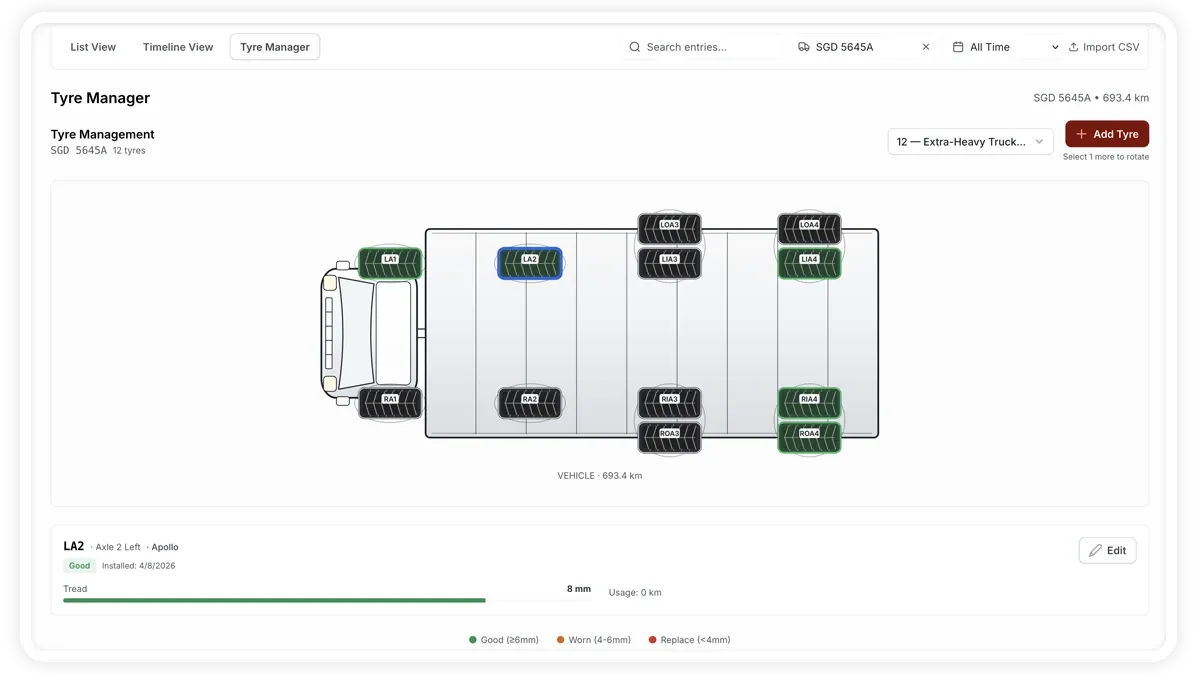
How to manage a vehicle’s tyres
- Go to Services > Maintenance and open the Tyre Manager view.
- Pick a vehicle — the layout shows its tyre positions based on the vehicle type.
- To record a tyre, add tyre data for a position — brand, install date, install odometer, tread depth, cost and status.
- To swap positions, use Rotate — it cycles the tyres through their positions.
- To fit a new tyre, use Replace — it resets that position to fresh-tyre defaults.
Tyre fields
- Position — where the tyre sits, following the vehicle-type layout.
- Brand — the tyre make.
- Install date — when the tyre was fitted.
- Install odometer — the reading at fitting, for wear tracking.
- Tread depth — the current depth measurement.
- Cost — what the tyre cost.
- Status — condition such as good.
Frequently asked questions
What does Rotate do?
Rotate cycles the tyres through their positions to even out wear — it moves each tyre to its next position rather than changing the tyre itself.
What happens when I replace a tyre?
Replace resets that position to fresh-tyre defaults, ready for you to enter the new tyre’s brand, install date, odometer, tread depth and cost.
Related
Next
Replace-vs-Keep Analysis (Vehicle Lifecycle)
Weigh depreciation against rising maintenance cost to get a keep, monitor or replace verdict, and schedule a replacement when it's time.
Learn more about this feature
Explore featureMore in Service & Maintenance
Didn't find what you needed?Contact support