Create PoI or Zone
PoI stands for Points of Interest. These are locations, typically business storefronts. A PoI could be a gas station, a hotel, a restaurant, a shopping mall, or a historical location.
Point of Interest specifies, at minimum, the latitude and longitude of the PoI, assuming a certain map datum. Every PoI will have a specific Latitude and Longitude.
PoI can be added in multiple ways; Search Places, Mark a PoI on Map and Creating PoI from History.
Search Places
Step 1: Select “MapView” tab
Step 2: Toggle “Show Right Pane”
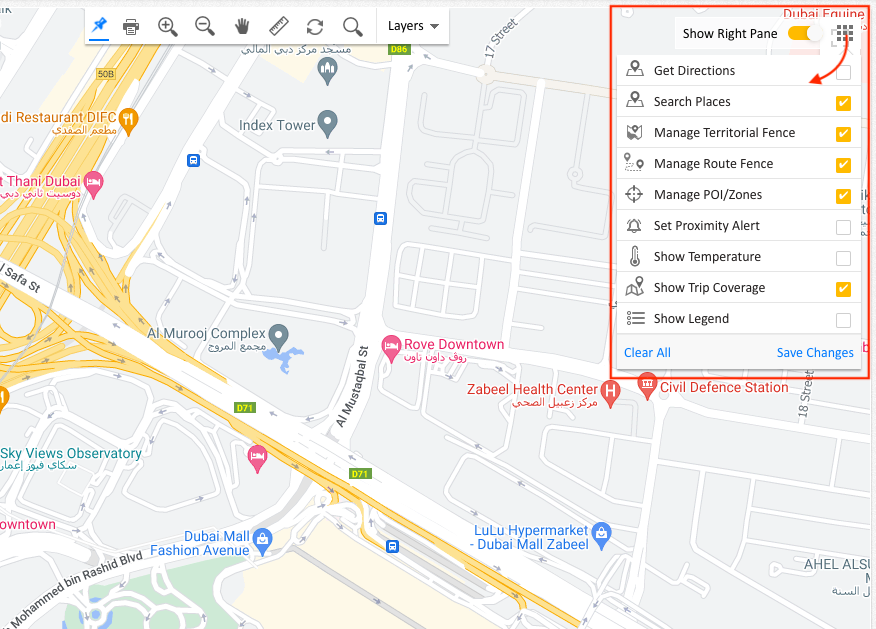
Toggle “Show Right Pane” from the drop down list, choose “Search places” (Maximum fields allowed is 5) and save the changes
Step 3: Choose a location
Choose “Search Places” and type the location where you wish to mark a PoI, application will redirect the map to that location. Once the location is typed and the same is displayed on the map, save the changes (new PoI is added to the list now)
For example, if you wish to search “Navy Exchange Main Singapore” type “Navy Exchange Main Singapore”, below “Search Places” and Choose “Navy Exchange Main Singapore” from the drop down (location will get listed automatically if the typed location is saved in Google Maps)
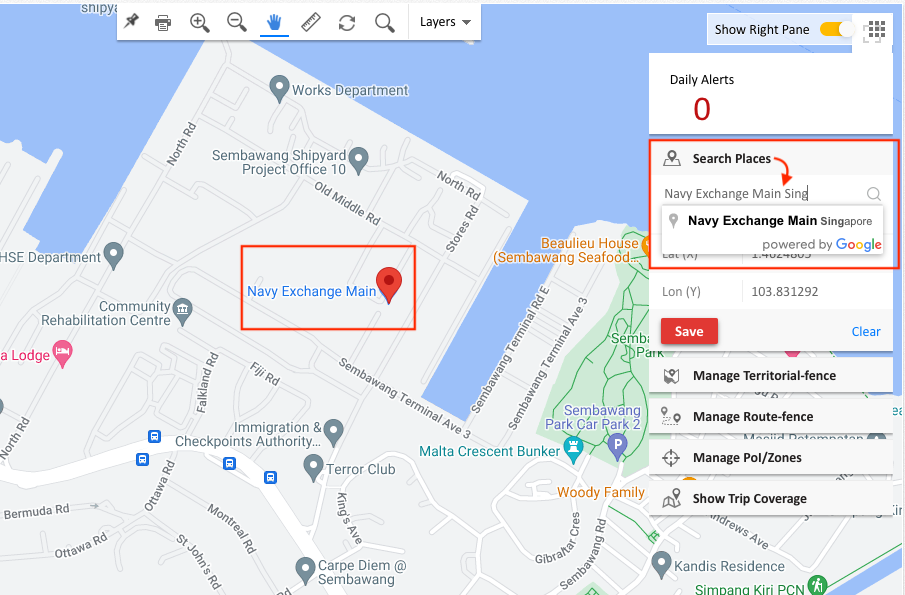
“Navy Exchange Main Singapore” is now saved as a PoI in your list
Now let’s see how to Mark a PoI on the map
Mark a PoI on Map
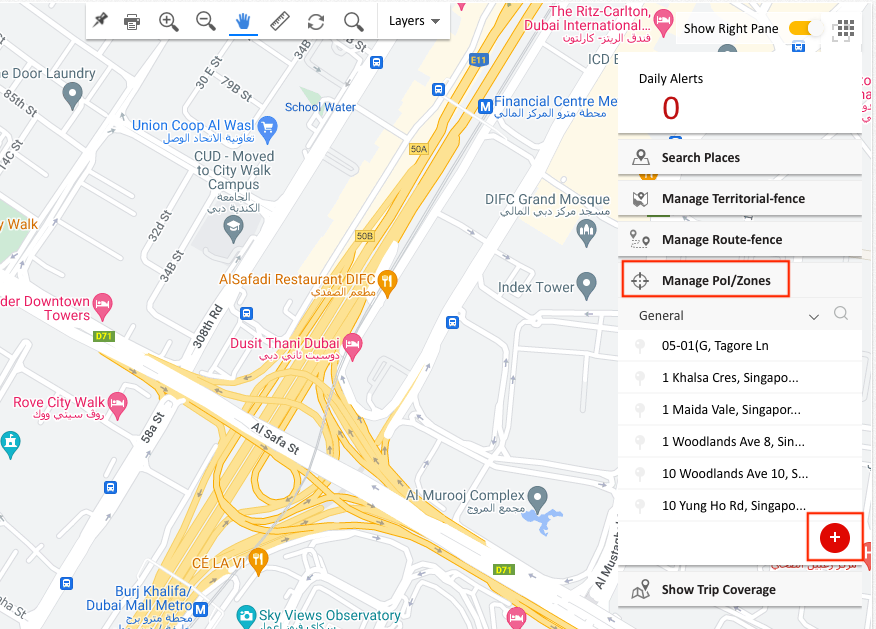
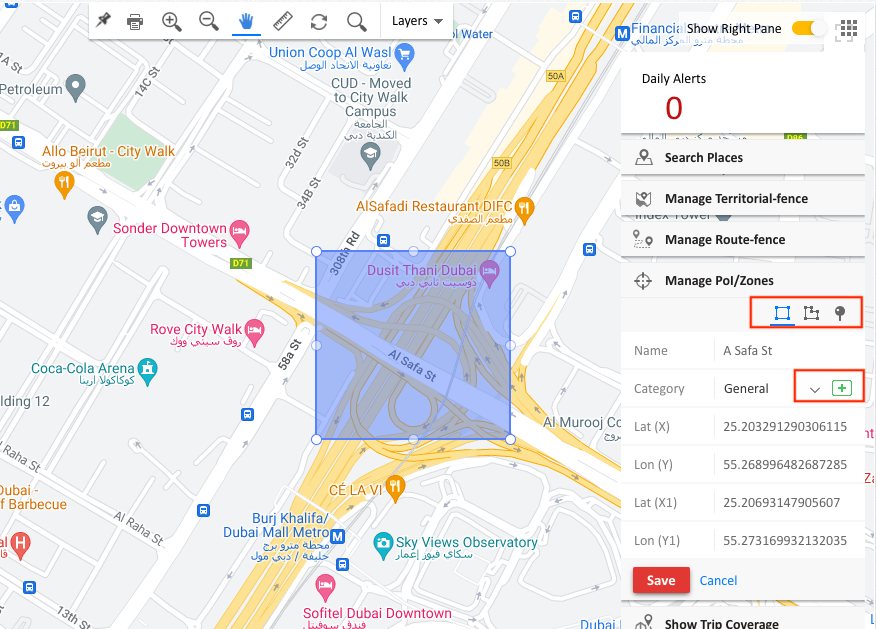
Step 1: Select “Manage PoI/Zones”
Click ”+” icon to create a new PoI/Zone
Step 2: Mark your PoI
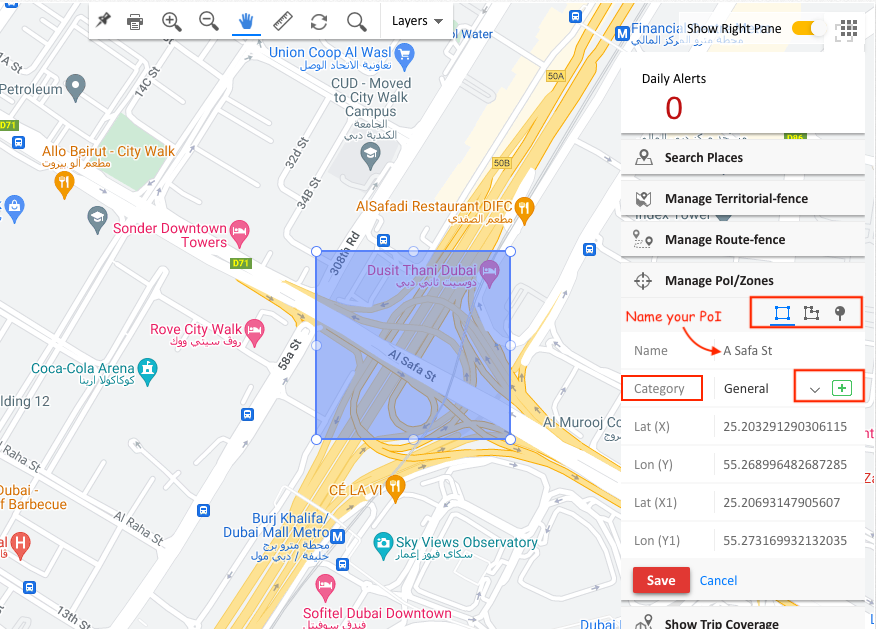
Mark PoI using any of the three options provided (Rectangle, Polygon, PoI).
Simply click, hold and drag the markers displayed on the map to mark a desired area.
Once done, name your PoI and choose a category (from drop down or add new by clicking on “+”) and click “Save”.
Creating PoI from History
Platform provides an easy option for the users to create PoI from History/completed trip simply by playing the vehicle history. This feature can be utilised if the user wish to create PoI in a route where vehicle frequently moves.
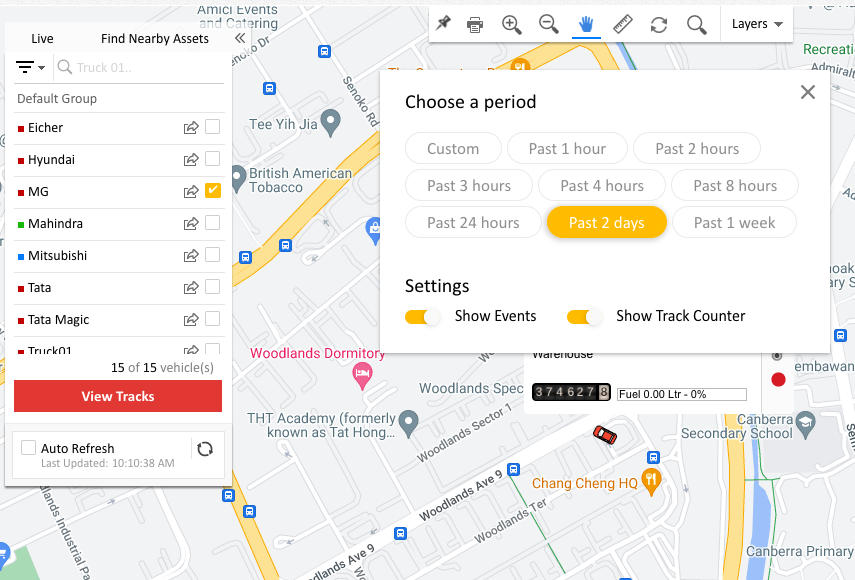
Step 1: View tracks/history
Play History by selecting the desired date.
Step 2: Create PoI
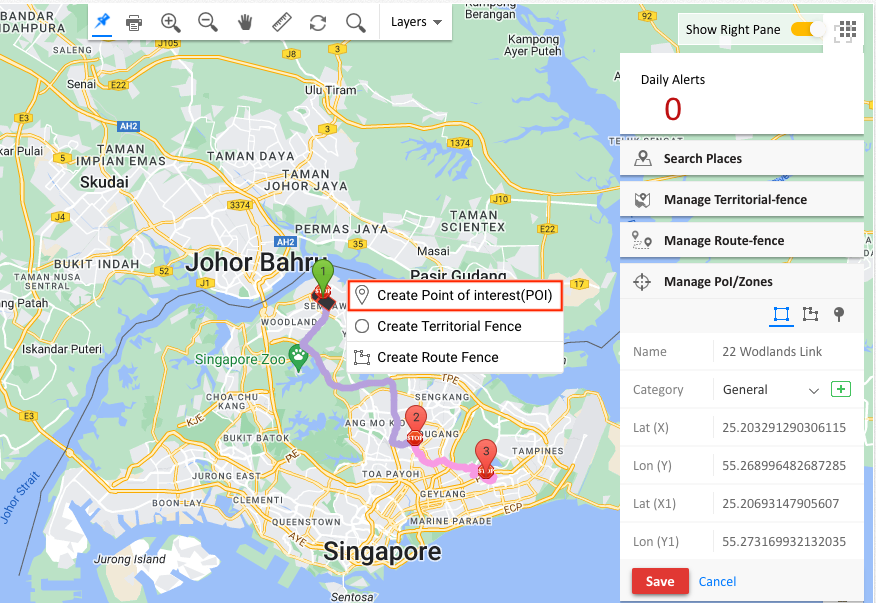
By right clicking next to any “STOP” or point on the displayed route, opt “Create Point of Interest (PoI)”
Step 3: Name your PoI
Name you PoI and choose a category (from drop down or add new by clicking on “+”) and save the chnages.
