Suraksha Mitr – What is it?
Suraksha Mitr project is a highly scalable, comprehensive vehicle tracking solution for public transport vehicles designed to enhance safety and enforcement.
It is compatible with the Automotive Industry Standards 140 (AIS-140) published by the Ministry of Road Transport & Highways (MoRTH), Govt. of India.
Why should you tag your vehicle to Suraksha mitr?
Whether you own a commercial truck, transport bus or taxi, Kerala Motor Vehicle Dept. (KMVD) has now made it mandatory to install Vehicle Location Tracking (VLT) GPS devices, meeting AIS 140 standards, in all commercial vehicles across Kerala State.
Once installed, KMVD requires all vehicle owners to register (called tagging) the vehicle to the Suraksha Mitr portal.
On successful registration, a temporary installation slip (Tag token) will be generated with a validity of 15 days.
Within this timeframe, the vehicle owner has to get the installation approved by the Motor Vehicle Inspector (MVI) at the respective regional transport offices (RTO).
This action is taken to ensure the safety and enforcement of rules in Kerala’s public transport vehicles. Failure to comply with these requirements may result in penalties and other punitive measures.
The new rule came into effect on 1st November 2018.
The following image depicts the process involved. AIS 140 GPS device Installation, registering on the Suraksha Mitra portal, getting the installation approved by RTO and the certificate issued.
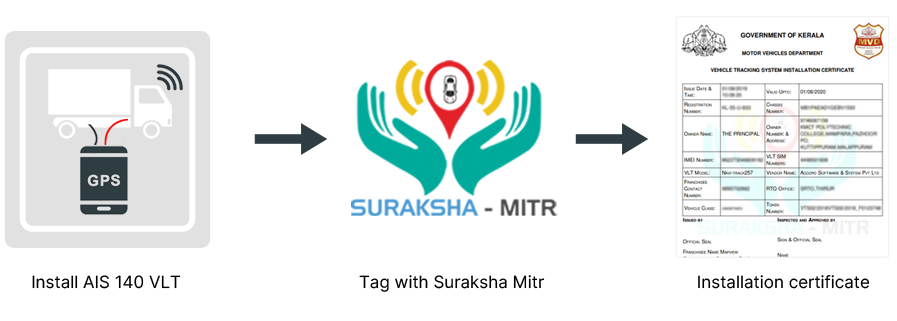
For your information:
Your AIS 140 GPS tracking service provider will complete registration and hand over a tag token (temporary installation slip). Take this token to RTO, where you’ll get official approval for your AIS 140 device installation and issue a certificate.
KMVD’s Suraksha mitra portal is linked to National Informatics Center (NIC) & Parivahan portal.
NIC Portal (https://www.nic.in) – The NIC is the premier science and technology organisation of the Government of India in informatics services and information and communication technology applications – and
Parivahan Portal (https://parivahan.gov.in) – It is an initiative by MoRTH (The Ministry of Road Transport & Highways) to automate all Vehicle Registration and Driving License related activities in transport authorities of the country with the introduction of smart card technology to handle issues like interstate transport vehicle movement and to create state and national level registers of vehicles/DL information.
Earlier, the vehicle registration details used to be available only in the NIC portal. However, the vehicle-related details are currently available in the Parivahan portal.
Prerequisites: Tagging to Suraksha Mitra portal
Before you begin the tagging process, please keep the following information handy.
1. Vehicle Plate #:
2. Chassis #:
3. The RTO where the vehicle is registered:
4. IMEI of the AIS 140 GPS device:
5. GSM numbers assigned to the eSIM (AIS 140 GPS device has an embedded SIM card with two telecom providers):
6. Mobile number of the vehicle owner:
7. Email address of the vehicle owner:
Steps: Tagging a vehicle
As a first step, visit the link; https://tracking.keralamvd.gov.in/
Suraksha mitra Login screen
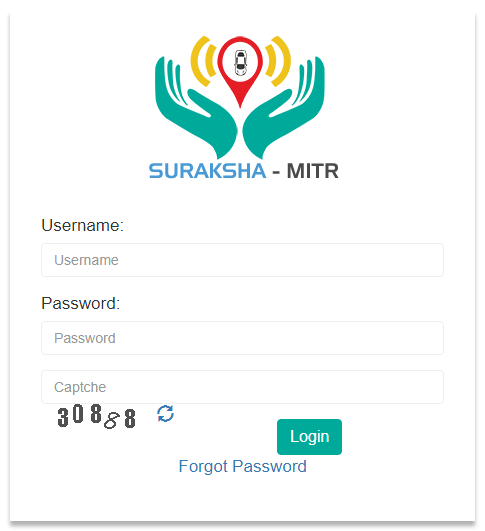
NOTE: If you’re a KMVD-registered franchisee who deals in Vehicle Tracking Units (VTUs) meeting AIS 140 standards, your GPS device manufacturer will have given you the login credentials.
After logging in, you will be redirected to the page displaying the Vehicle Location Tracking (VLT) tagging form.
VLT Tagging form

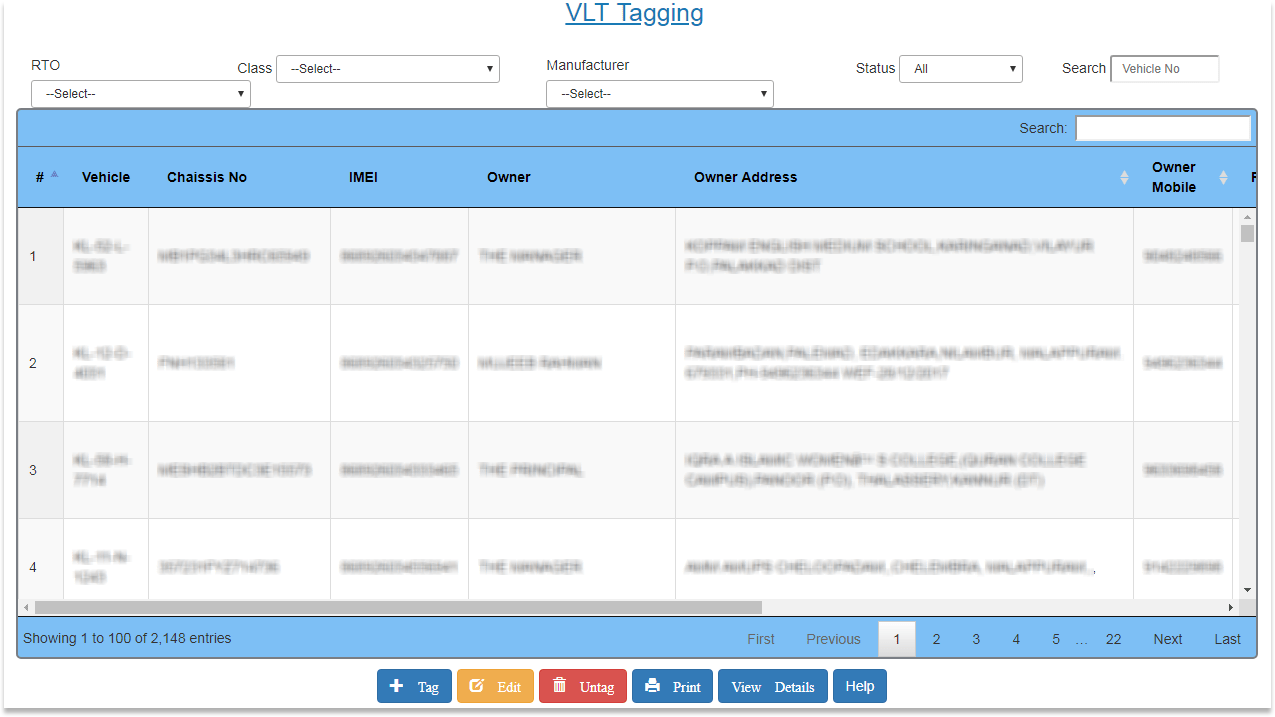
Click the ‘Tag’ on the screen’s bottom.
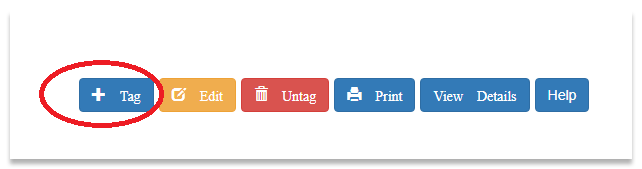
Upon clicking the “Tag” button, Suraksha Mitra “Tag Vehicle” form will get displayed in a pop-up window.
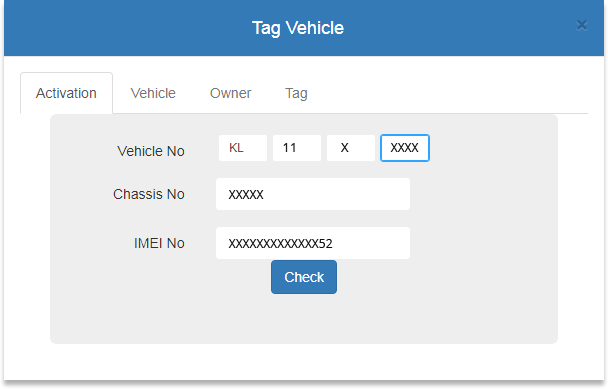
Type in the required details in the specified format in relevant fields, viz.,
1) In the case of vehicles where you have permanent registration numbers;
- Vehicle Number
- Chassis No – This should be the last 5 digits of your vehicle Chassis No.
- IMEI No – IMEI No. as appearing on the AIS GPS device.
After entering the details, click the “Check” button
2) In the case of new vehicles (without permanent registration numbers) please follow the steps:
Navigate to ‘VLT Tagging’.
VLT Tagging-Vahan form

Choose ‘VLT Tagging – Vahan’ from the dropdown list and click the ‘Tag’ button
It will take you to the below screen, i.e. Parivahan portal.
Parivahan Tag Vehicle form
Choose ‘VLT Tagging – Vahan’ from the dropdown list and click the ‘Tag’ button
Here type in Vehicle Number or Temporary Vehicle Reg No. & IMEI No.
Note: You may verify the device communication from the AVLView portal if required.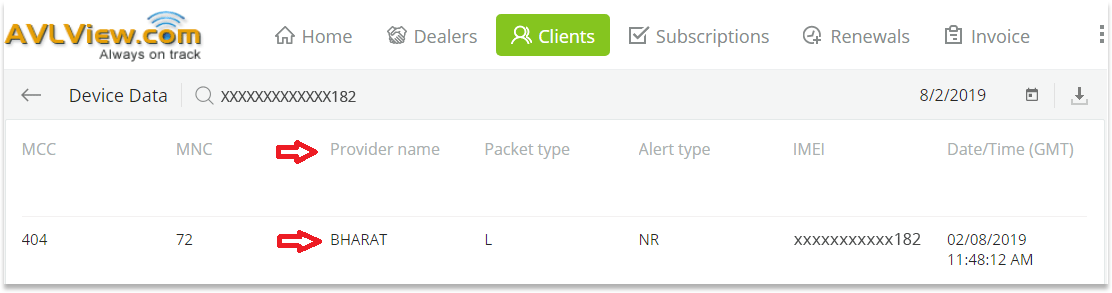
IMPORTANT: If the AIS device has sent data to the CDAC server within 2 hours, the latest data will be displayed in the fields below.
Vehicle No., Date, Time, VLT IMEI No., Main Power and Ignition.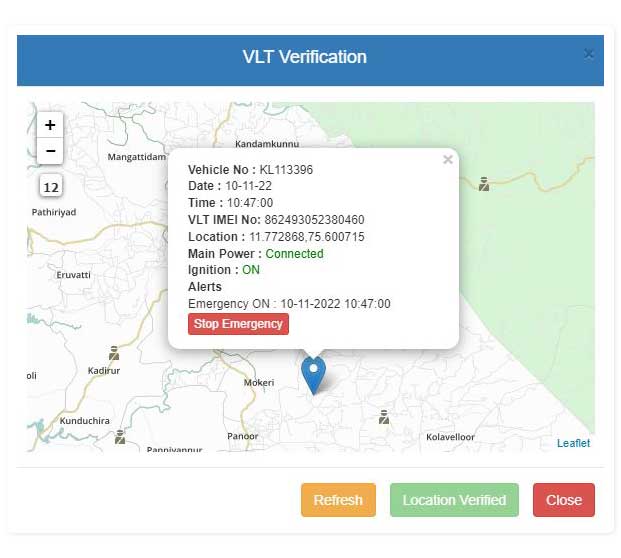
Clicking ‘Refresh’ fetches the latest data in the above screen,
Before VLT verification, the panic button status should be checked properly, i.e. ON and OFF status is correctly detected. To perform this check, an emergency panic alert needs to be created either from the vehicle (by manually pressing the panic button) or using the device (by sending SMS commands to the device).
Note (if emergency ON and OFF status is not checked, the “Location verified” button will be in a disabled state).
Once the panic alert is generated, the VLT verification screen will display an “Emergency ON” alert.
Click “Stop Emergency” to change the emergency alert status to “OFF”
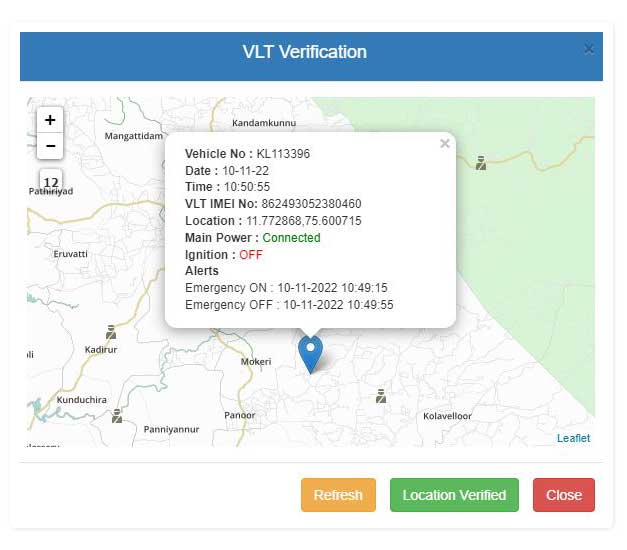
To proceed further, click “Location verified”, which will take you to the following screen.
Activate eSIM
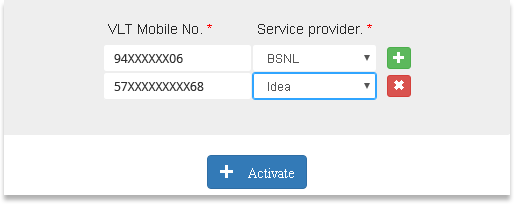
In the ‘VLT Mobile field, enter the relevant eSim number (MSISDN) and choose the respective service provider from the drop-down list.
Now Click the ‘Activate’ button.
Vehicle – Tag Vehicle Form
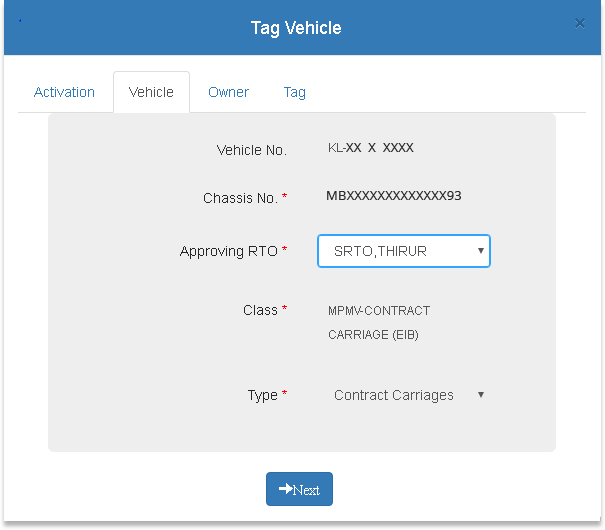
Now from the dropdown corresponding to the ‘Approving RTO’ field, you may choose the relevant RTO office (You can find this information in the Registration Certificate (RC).
The fields ‘Class’ & ‘Type’ will be populated automatically based on the information available in the Registration Certificate (RC book), and this data is fetched from the NIC server.
Click “Next” to proceed to the next screen.
Owner – Tag Vehicle form
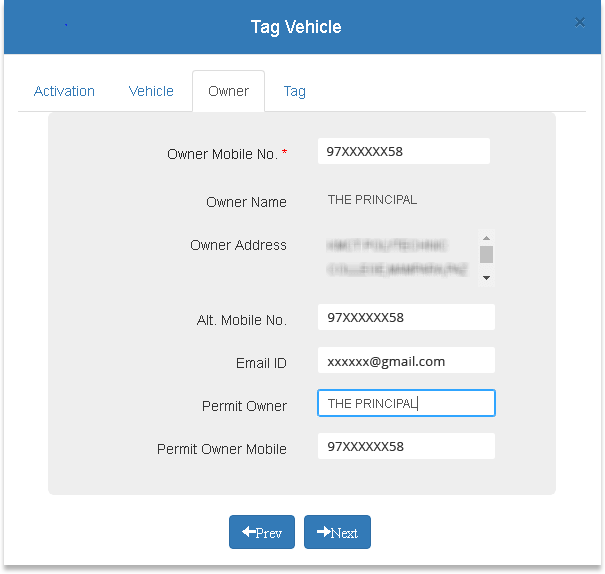
Enter the following details:
Owner’s mobile Number – Type in the registered vehicle owner’s (as in RC) mobile number. The primary mobile number to which KMVD notifications and One-time password (OTP) will be received.
Alt. mobile number – Alternate mobile number (of the owner). It is optional and can be changed later in the Suraksha mitr portal.
E-mail ID – Enter the valid email address of the owner.
Permit Owner – Copy and paste the same information in the ‘Owner Name’ Tab.
Permit Owner Mobile – Enter the vehicle owner’s primary mobile number.
Click ‘Next’
VLT Manufacturer – Tag Vehicle form
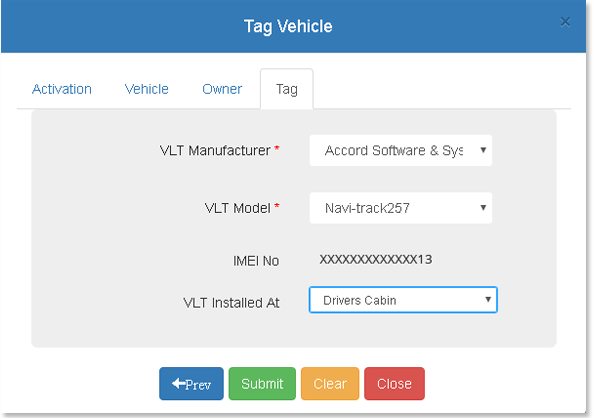
Enter required details viz.,
VLT Manufacturer – This field will be populated automatically.
VLT Model – Choose from the dropdown list.
Now click the “Submit” button to process the information. You’ll soon receive an OTP to the registered mobile number on success.
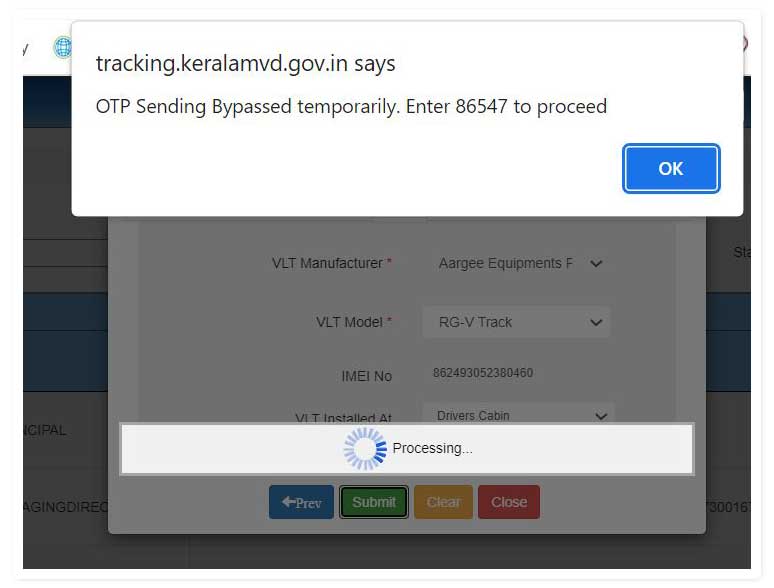
GOT the above message?
You are almost there……
Click OK, enter the OTP number (here 86547) in the field displayed on the following screen, and click “Check OTP”.
OTP verification form
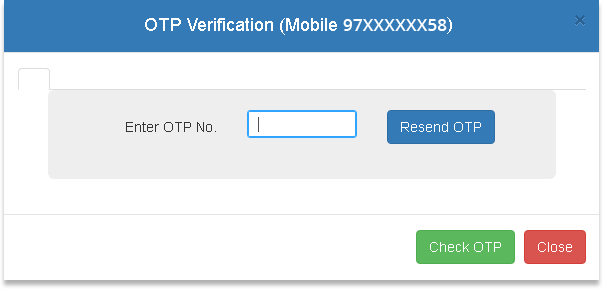
Once the OTP verification is successful, you will receive the below message:
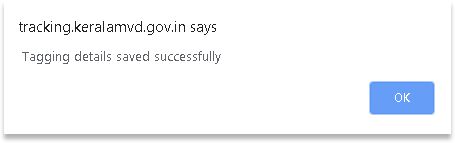
Now you are DONE with the process.
An SMS will be received on the vehicle owner’s mobile number confirming that the vehicle has been tagged successfully.
Tag Token (Temporary Installation Slip)

Click ‘Print’ to generate the tagging token (Temporary Installation Slip).
Tag Token (Temporary Installation Slip)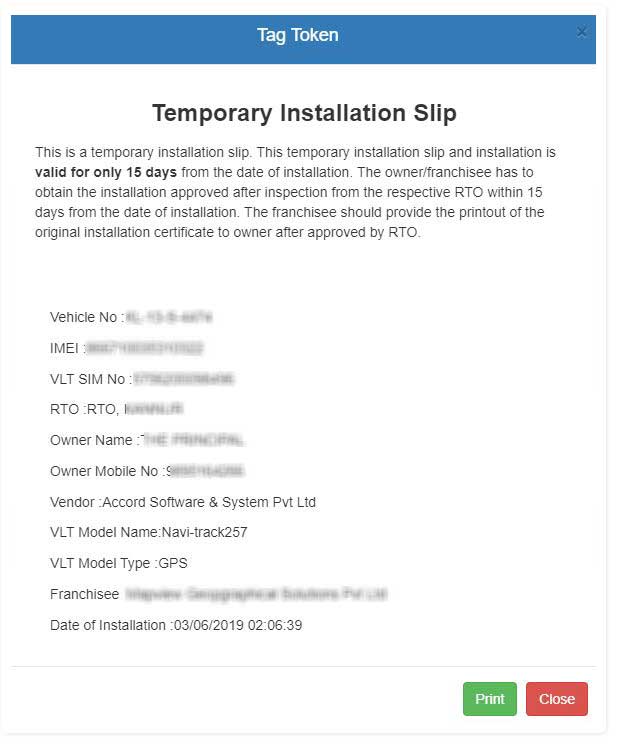
The AIS 140 GPS device installation is almost complete, but we still need to get it approved by the RTO in order for this step—and, therefore, the entire project—to be successful.
And as suggested, the vehicle owner should approach the respective RTO immediately (within 15 days) as part of the vehicle fitness test after receiving a tagging token to get an installation approved. Once approved, RTO will issue an Installation certificate.
Vehicle Tracking System Installation Certificate
![]()
The installation process for GPS devices should take at most 10 minutes if the device has been properly installed and data communication to the Suraksha Mitra portal is working correctly.
Please do not tamper with the installation, remove (turn on/off) the battery power or unnecessarily press emergency switches. Doing so may result in government regulators being notified, as well as other repercussions.


